Step-by-Step Sharpening Process
Let’s dive in!
Why is Knife Sharpening Important?
Before we jump into the steps, let’s understand why knife sharpening is crucial. Over time, even the highest quality knives start to lose their sharpness. Dull blades not only make your cutting tasks longer and more laborious but can also compromise your safety in the kitchen. Sharpening your knives regularly not only ensures smooth and effortless cuts but also extends the lifespan of your knives.
Step 1: Gather the Necessary Tools
Before you begin sharpening your knives, it’s important to have the right tools at hand. Here are the essential items you’ll need:
- Sharpening stone or whetstone: Necessity for sharpening your knives.
- Honing steel: Helps maintain knife sharpness between sharpening sessions.
- Angle guide: Ensures consistent and accurate sharpening angles.
- Towel or cloth: Used to wipe down the knives and maintain cleanliness.
Step 2: Understand the Sharpening Angles
Various knives require different sharpening angles to achieve optimal results. Here are some common sharpening angles for different types of knives:
- 15-20 degrees: Ideal for most Western-style knives.
- 10-15 degrees: Preferred for Japanese-style knives and other thin blades.
- 20-25 degrees: Suitable for heavy-duty knives like cleavers or hunting knives.
Understanding the proper angle for your knife is important to maintain its original design and functionality.
Step 3: Start with Coarse Grit
Begin the sharpening process by using the coarse grit side of your sharpening stone. Follow these steps:
- Wet the sharpening stone and place it on a steady surface.
- Hold the knife at the desired angle and place it on the stone.
- Using light pressure, move the blade along the stone in a sweeping motion, following the knife’s curvature.
- Repeat this process on both sides of the blade for several strokes.
- Ensure consistent sharpening by counting the strokes used on each side.
This coarse grit sharpening helps remove any nicks, chips, or dullness from the blade’s edge.
Step 4: Refine with Fine Grit
After completing the coarse grit sharpening, switch to the fine grit side of the sharpening stone. The fine grit helps refine the edge, resulting in a razor-sharp finish. Here’s what you should do:
- Repeat the same wetting process for the fine grit side of the sharpening stone.
- Hold the knife at the desired angle and place it on the stone.
- Using light pressure, move the blade along the stone, maintaining the sweeping motion.
- Repeat the strokes on both sides of the blade, ensuring even sharpening.
- Regularly check the sharpness of the knife by carefully running your finger along the blade. Be cautious to avoid injuries.
This fine grit refining process helps create a polished and precise cutting edge that is ready for any culinary task.
Step 5: Honing the Blade
Once you’ve sharpened your knife, it’s time to hone the blade. Honing helps realign the microscopic burrs that are created during the sharpening process. Follow these steps:
- Hold the honing steel vertically, with the tip resting on a sturdy surface.
- Hold the knife handle firmly and place the heel of the blade against the top of the steel.
- Maintaining a 15-20-degree angle, slide the blade down the steel, pulling it towards your body.
- Alternate sides and repeat this process for several strokes.
Honing your knife regularly keeps the edge perfectly aligned and ensures its longevity between sharpenings.
Final Thoughts
Congratulations! You’ve successfully learned the step-by-step sharpening process for your knives. Remember, keeping your knives sharp enhances your cooking experience and improves your kitchen safety. Regular maintenance is the key to maintaining the sharpness of your knives for years to come. Here are some key takeaways:
- Regularly sharpen your knives to improve cutting efficiency and safety.
- Use the correct angle guide to achieve consistent and accurate sharpening.
- Start with a coarse grit to remove any chips or dullness from the blade.
- Finish with a fine grit to refine the edge and create a razor-sharp finish.
- Hone your knives regularly to maintain their sharpness in between sharpening sessions.
By following these steps and taking care of your knives, you’ll enjoy the delightful experience of effortlessly slicing through your ingredients like a professional chef. Happy cooking!
Expert Tips for Razor-Sharp Blades
Why is blade sharpness important?
Before we delve into the tips, let’s understand why blade sharpness is crucial. A sharp blade significantly reduces the chances of nicks, cuts, and irritation while shaving. A dull blade, on the other hand, can lead to discomfort and undesirable results. By following these expert tips, you can enhance your shaving routine and achieve optimal results every time.
Tips for sharp blades:
1. Invest in high-quality blades
Quality matters when it comes to blades. Opt for reputable brands known for their precision and sharpness. Consider choosing blades made from stainless steel or carbon steel, as these materials are known for their durability and sharpness. Although high-quality blades may be more expensive, they are worth the investment for a superior shaving experience.
- Choose blades from reputable brands known for precision and sharpness.
- Consider stainless steel or carbon steel blades for durability and sharpness.
2. Proper storage
Proper storage is essential to maintain blade sharpness. After each shave, make sure to thoroughly rinse the blade and pat it dry. Storing blades in a dry environment away from moisture will prevent rusting and extend their lifespan. Some people opt for blade banks or containers designed specifically for blade disposal, ensuring safety and preventing accidental injuries.
- Rinse the blade thoroughly after each shave.
- Pat the blade dry before storing.
- Store blades in a dry environment away from moisture.
- Consider using blade banks or containers for safe disposal.
3. Regular cleaning and maintenance
To keep your blades sharp, it’s important to regularly clean and maintain them. After rinsing the blade, gently brush it with an old toothbrush to remove any residues or hair trapped between the blades. Additionally, consider applying a few drops of mineral oil or blade oil to prevent oxidation, further enhancing the longevity of the sharp edge.
- Gently brush the blade with an old toothbrush to remove residues.
- Apply a few drops of mineral oil or blade oil to prevent oxidation.
4. Sharpening methods
When your blades start to dull, you may consider sharpening them. There are various methods available, such as using a leather strop or a honing stone. A leather strop can be used to realign the blade’s edge, while a honing stone can be used to remove minor nicks and reshape the cutting edge. However, sharpening blades requires precision and practice, so if you are unsure, it’s advisable to seek professional help.
- Use a leather strop to realign the blade’s edge.
- A honing stone can be used to remove minor nicks and reshape the cutting edge.
- Seek professional help if you are unsure about sharpening blades.
5. Replace blades regularly
No matter how well you maintain your blades, they will eventually lose their sharpness. It’s important to replace them at the right time to avoid discomfort and ensure optimal shaving results. As a general guideline, if you feel pulling or tugging during the shaving process and notice a decline in performance, it’s time to replace the blade.
- Replace blades when you feel pulling or tugging during shaving.
- Notice a decline in performance as an indicator for blade replacement.
The benefits of razor-sharp blades:
Now that you know how to maintain razor-sharp blades, let’s explore the benefits they provide:
- Closer shave: A sharp blade cuts hair cleanly, resulting in a closer shave.
- Reduced irritation: Sharp blades minimize tugging and pulling, reducing skin irritation.
- Efficiency: With sharp blades, you’ll spend less time shaving as they effortlessly glide across your skin.
- Cost-effective: Proper maintenance and timely replacement of blades can save you money in the long run.
- Enhanced safety: Sharp blades reduce the risk of nicks and cuts, ensuring a safer shaving experience.
In conclusion, maintaining sharp blades is crucial for a comfortable and effective shaving routine. By investing in high-quality blades, proper storage, regular cleaning and maintenance, and timely replacement, you can achieve a close and irritation-free shave. Remember to practice caution when sharpening blades and seek professional assistance if needed. Take care of your blades, and they will take care of your grooming needs.
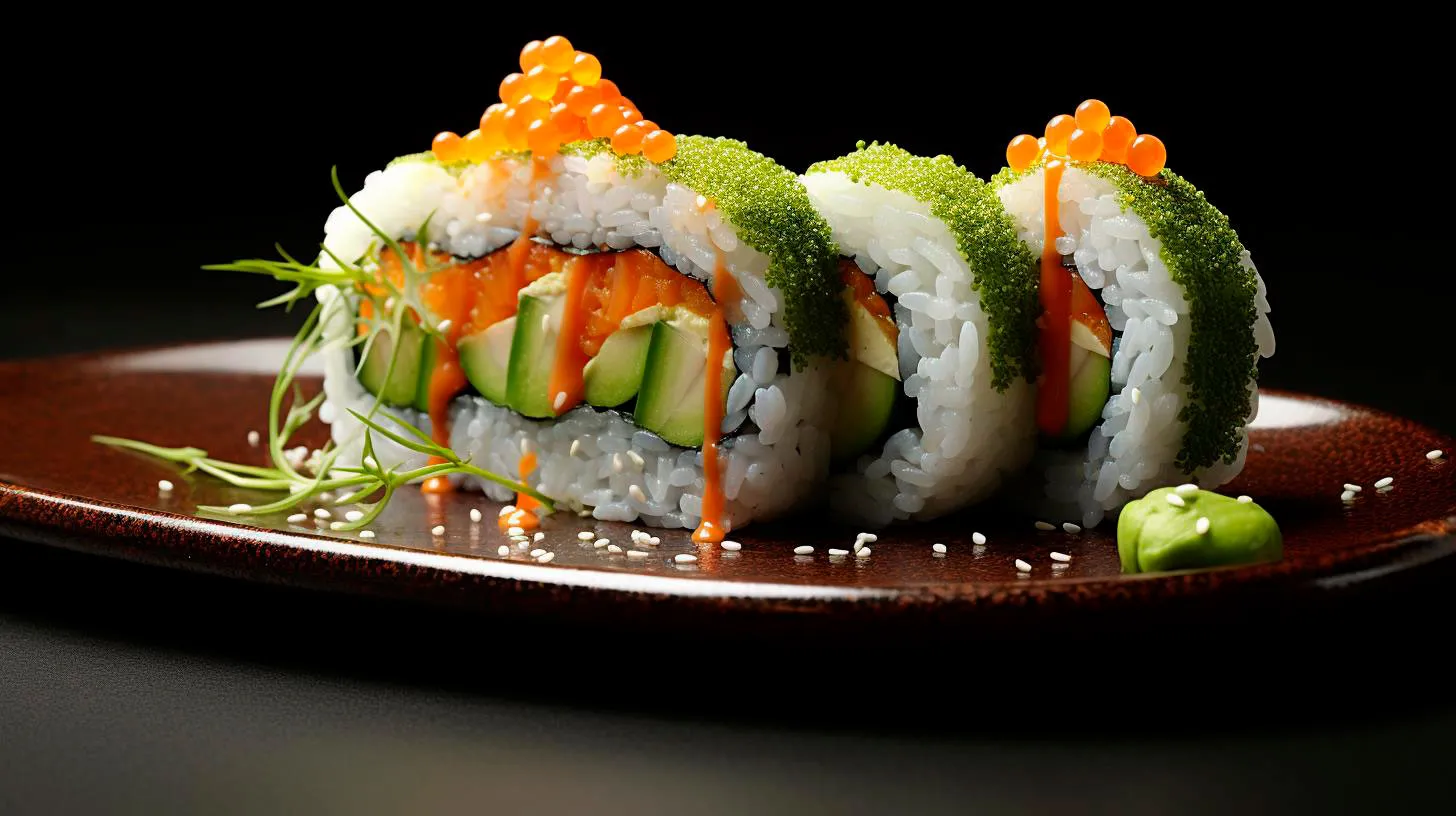
Honing and Maintaining Your Sushi Knife
In this article, we will discuss the key steps you should take to hone and maintain your sushi knife, keeping it in top shape for your culinary adventures.
The Importance of Honing
Honing is the process of realigning the blade edge, maintaining its sharpness and prolonging its lifespan. Even the highest quality sushi knives will eventually start to lose their edge, and honing helps to restore their cutting ability. Regular honing keeps your knife performing at its best, making each slice effortless and precise.
Here are the key benefits of honing your sushi knife:
- Improved Performance: Honing renews the sharpness of your knife, ensuring clean and precise cuts every time you prepare sushi.
- Longevity: By regularly honing your knife, you reduce the need for frequent sharpening, leading to a longer lifespan for the blade.
- Safety: A properly honed knife reduces the risk of slips and accidents in the kitchen, as it requires less force to cut through ingredients.
Now that you understand the importance of honing, let’s dive into the steps you should follow to maintain your sushi knife.
Maintaining Your Sushi Knife
Step 1: Cleaning
Before honing your sushi knife, it is important to clean it properly. Rinse the knife with warm water and mild dish soap, ensuring that all food particles and residue are removed. Avoid using abrasive materials or harsh cleaners, as they can damage the blade.
Step 2: Honing
Honing your sushi knife is a simple process that can be done using a honing rod or sharpening stone. Hold the honing rod vertically with the tip resting on a sturdy surface. Angle the knife at approximately 20 degrees and glide it along the honing rod in a sweeping motion, starting from the base of the blade and moving towards the tip. Repeat this process on both sides of the blade, maintaining consistent pressure and angle. Aim for around 10 to 15 strokes on each side.
Alternatively, if you choose to use a sharpening stone, follow the manufacturer’s instructions for proper honing technique.
Step 3: Maintenance
After honing your sushi knife, it is important to properly store and maintain it to keep it in optimal condition. Here are some key points to consider:
- Dry the Knife: Make sure the knife is completely dry before storing it to prevent rust formation. Use a soft cloth to remove any moisture.
- Store it Properly: Keep your sushi knife in a knife block, sheath, or on a magnetic strip, ensuring that the blade is protected and not in contact with other utensils. Avoid storing it in a drawer where it can easily get damaged or dull.
- Regular Sharpening: While honing helps maintain the sharpness of your knife, regular sharpening is necessary to restore the edge when it becomes too dull. Consider professional sharpening or learn how to sharpen your knife using whetstones.
- Safe Handling: Always handle your sushi knife with care. Avoid using it on hard surfaces like glass or granite, as this can damage the delicate blade. Additionally, refrain from using the knife for tasks other than sushi preparation to prevent unnecessary wear and tear.
Key Takeaways
Your sushi knife requires regular honing and maintenance to preserve its performance and longevity. By following these steps, you can ensure that your knife remains sharp and efficient:
- Clean your knife thoroughly before honing.
- Use a honing rod or sharpening stone to realign the blade edge.
- Properly store and maintain your knife to prevent damage and rust.
- Regularly sharpen the knife to restore its cutting ability.
- Handle the knife with care and avoid using it on hard surfaces.
Taking care of your sushi knife is not only essential for your culinary endeavors but also for your own safety. By dedicating a few minutes to honing and maintaining your knife, you can enjoy the art of sushi-making with precision and ease.
Choosing the Right Sharpening Stone
Why is Choosing the Right Sharpening Stone Important?
Selecting the appropriate sharpening stone is crucial as it directly impacts the final sharpness, durability, and longevity of your tools. An improper choice can result in inefficient sharpening, reduced tool performance, and even potential damage. To help you make an informed decision, here are some important factors to consider:
Grit
The grit level of a sharpening stone determines the aggressiveness and coarseness of the sharpening process. Different tools require different levels of grit to achieve the desired sharpness. Here are the key types of grit in sharpening stones:
- Coarse Grit (120-400) – Ideal for repairing chips or reshaping damaged tools.
- Medium Grit (800-2000) – Perfect for maintaining the edge on most tools.
- Fine Grit (3000-8000) – Provides a polished edge for finishing and refining.
Remember, the higher the grit number, the finer the stone. It’s essential to choose a sharpening stone with the appropriate grit range for the tool you are sharpening.
Stone Material
Sharpening stones are available in various materials, each with its advantages and disadvantages. The most common types include:
- Oil Stones – Made from aluminum oxide or silicon carbide, these stones require oil as a lubricant and are known for their versatility.
- Water Stones – Known for excellent sharpening capabilities, water stones are made from natural or synthetic materials and only require water for lubrication.
- Diamond Stones – Constructed with a diamond-coated surface, these stones are extremely durable and offer quick sharpening but are relatively expensive.
Consider the pros and cons of each material before making your decision. Additionally, keep in mind the frequency of use and maintenance requirements as different materials may have specific care instructions.
Size and Shape
Another crucial aspect to consider is the size and shape of the sharpening stone. The dimensions should be compatible with the tools you intend to sharpen. A larger stone provides more surface area for efficient sharpening, while a smaller stone offers portability benefits for field use.
Advantages of Choosing the Right Sharpening Stone
Investing time and effort in selecting the appropriate sharpening stone can yield several advantages, including:
- Enhanced tool performance and efficiency
- Extended tool longevity and durability
- Accurate and consistent sharpening results
- Reduced risk of tool damage
- Minimized effort and time spent on sharpening
Key Takeaways
Choosing the right sharpening stone is essential for maintaining sharp, reliable, and efficient tools. Remember the following key points:
- Select the appropriate grit level based on your tool’s requirements.
- Consider the advantages and disadvantages of various stone materials.
- Ensure the size and shape of the stone are suitable for your tools.
- Investing in the right sharpening stone leads to improved tool performance and longevity.
By carefully considering these factors and weighing your options, you can confidently choose a sharpening stone that will meet your needs and help you achieve exceptional tool sharpness. Happy sharpening!